Birthday Cake Cookies-Deliciously Fun & Easy Recipe
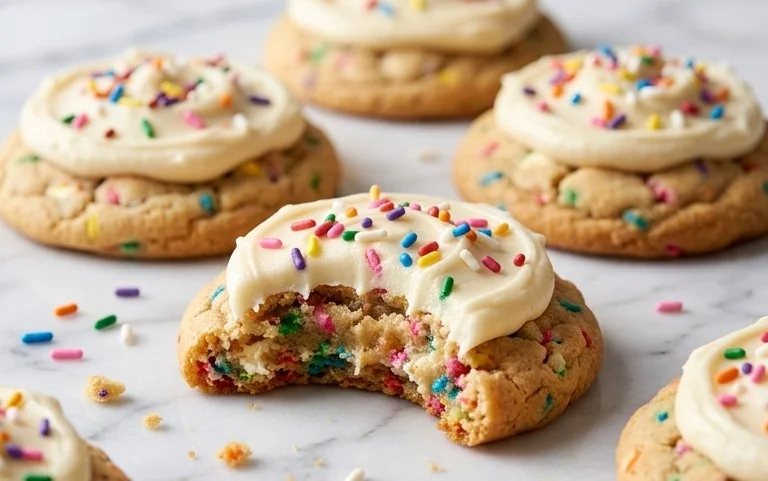
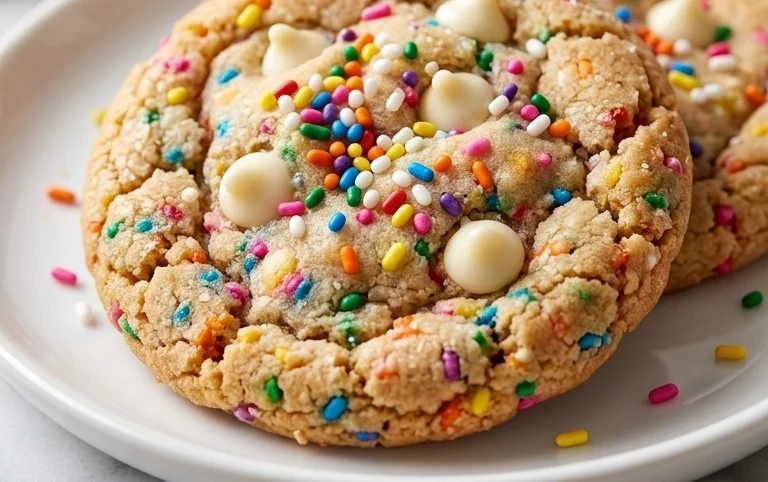
Birthday Cake Cookies are the ultimate celebration in every bite, aren’t they? There’s something incredibly magical about a classic birthday cake – that sweet frosting, the sprinkle explosion, the sheer joy it brings. But let’s be honest, sometimes the thought of baking and decorating a whole cake can feel a little daunting. That’s precisely where these incredible Birthday Cake Cookies come in! They capture all the beloved flavors and festive spirit of a birthday cake, but in a perfectly portioned, delightfully chewy cookie form. What makes them so special? They’re incredibly easy to whip up, making them the perfect treat for last-minute celebrations or just when you’re craving that unmistakable birthday cheer. These cookies are a crowd-pleaser for a reason – who can resist the delightful combination of sweet cake batter flavor, colorful sprinkles, and a tender, melt-in-your-mouth texture? Get ready to bake up some pure happiness!
Birthday Cake Cookies
There’s something undeniably magical about birthday cake. The vibrant colors, the sweet frosting, the sheer joy it represents. But sometimes, the thought of baking a full-fledged cake can feel a little overwhelming, especially when you’re craving that festive flavor in a more manageable, portable format. Enter these Birthday Cake Cookies! They capture all the essence of a celebratory slice – that beloved vanilla-sugar sweetness, the fun pop of sprinkles – in a delightfully chewy, melt-in-your-mouth cookie. These are perfect for parties, a special treat for yourself, or just to brighten up any ordinary day. They’re incredibly easy to make, and the kids (and adults!) will absolutely adore them. Let’s get baking and bring a little confetti-filled cheer to your kitchen!
Ingredients:
Creating the Cookie Dough
The first step to delicious Birthday Cake Cookies is creaming together our butter and sugars. This process is crucial for creating a tender cookie with a good texture. Make sure your butter is truly softened to room temperature – it should yield slightly when you press it with your finger, but not be melted or greasy. In a large mixing bowl, combine the softened unsalted butter with the granulated sugar and the light brown sugar. Using an electric mixer (a stand mixer with a paddle attachment or a hand mixer), beat these ingredients together on medium speed for about 2-3 minutes. You’re looking for a light and fluffy mixture, almost like pale yellow frosting. This aeration will help make your cookies light and airy. Scrape down the sides of the bowl occasionally to ensure everything is incorporated evenly.
Next, we’ll add our wet ingredients. Crack in the large egg and add the vanilla extract. If you’re opting for that extra layer of delicate, sweet flavor, now’s the time to add the almond extract. Be cautious with almond extract, as it’s quite potent, so start with ¼ teaspoon and add a touch more if you like a stronger almond note. Beat these in until they are well combined with the butter and sugar mixture. The mixture might look a little separated or curdled at this stage, and that’s perfectly fine. Just keep beating until it’s mostly smooth.
Now it’s time to introduce the dry ingredients. In a separate medium-sized bowl, whisk together the all-purpose flour, cornstarch, baking soda, and sea salt. Whisking these together before adding them to the wet ingredients ensures that the leavening agents (baking soda) and salt are evenly distributed throughout the flour, which prevents pockets of saltiness or uneven rising in your cookies. Once combined, gradually add this dry mixture to the wet ingredients in the large bowl. Mix on low speed, or by hand with a spatula, just until the flour streaks have disappeared. It’s important not to overmix the dough at this stage, as overmixing can develop the gluten in the flour too much, resulting in tough cookies. We want a tender crumb, so stop as soon as you no longer see dry flour.
The grand finale of our dough creation is the sprinkles! Gently fold in the rainbow sprinkles until they are just distributed throughout the dough. Again, avoid overmixing; we want vibrant specks of color, not a homogenous pinkish-red dough. The sprinkles add that essential birthday cake visual and a subtle textural crunch.
Chilling and Shaping the Cookies
Before we can bake these beauties, a little chill time is highly recommended. Cover the bowl of cookie dough with plastic wrap and refrigerate for at least 30 minutes, or up to 2 days. Chilling the dough allows the fats to firm up, which prevents the cookies from spreading too much during baking, resulting in thicker, chewier cookies. It also allows the flavors to meld together, creating a more complex taste.
Once the dough is chilled, preheat your oven to 350°F (175°C). Line baking sheets with parchment paper. Parchment paper is a lifesaver for cookie baking, as it prevents sticking and makes for easy cleanup.
Using a cookie scoop or a tablespoon, scoop rounded portions of dough onto the prepared baking sheets, leaving about 2 inches between each cookie to allow for spreading. If you like your cookies a bit flatter and more spread out, you can gently press down on the tops of the dough balls with the palm of your hand or the bottom of a glass.
Baking and Finishing Touches
Bake the cookies for 9-12 minutes, or until the edges are lightly golden brown and the centers still look slightly soft. The cookies will continue to set up as they cool on the baking sheet. For a chewier cookie, err on the side of underbaking slightly. Once baked, let the cookies cool on the baking sheet for about 5-10 minutes before carefully transferring them to a wire rack to cool completely. This is important because warm cookies are very fragile and can easily break if moved too soon.
For an extra burst of birthday magic, you can even sprinkle a few more extra rainbow sprinkles on top of the cookies immediately after they come out of the oven, while they are still warm and the sprinkles will adhere. This creates an even more festive and visually appealing cookie.
These Birthday Cake Cookies are best enjoyed fresh, but they can be stored in an airtight container at room temperature for up to 3-4 days. They also freeze beautifully! You can freeze the baked cookies, or even freeze the dough balls before baking. Enjoy the taste of celebration, one delightful bite at a time!
Conclusion:
And there you have it! These Birthday Cake Cookies are a surefire way to bring a smile to anyone’s face, whether it’s their actual birthday or just a day that calls for a little extra sweetness. I love this recipe because it perfectly captures the fun and festive flavor of birthday cake in a chewy, melt-in-your-mouth cookie form. The sprinkle-filled dough is a joy to make, and the resulting cookies are just as beautiful as they are delicious. They’re incredibly versatile, making them perfect for any celebration or simply as a delightful treat to brighten your day. So go ahead, gather your ingredients, and give these Birthday Cake Cookies a try – I promise you won’t be disappointed!
Serving Suggestions:
These cookies are fantastic on their own, of course. But for an extra special touch, consider serving them with a tall glass of cold milk, or even alongside a scoop of vanilla ice cream. They also make a wonderful addition to a dessert platter for parties and gatherings.
Variations to Explore:
Don’t be afraid to get creative! You can swap out the sprinkles for different colors and shapes, or even add a hint of almond extract to the dough for a deeper flavor. For a chocolatey twist, try adding a handful of mini white chocolate chips.
Frequently Asked Questions:
Can I make these cookies ahead of time?
Absolutely! You can bake the cookies and store them in an airtight container at room temperature for up to 3-4 days. They tend to stay wonderfully chewy. You can also freeze baked and cooled cookies for up to 3 months; just thaw them at room temperature before enjoying.
My sprinkles are bleeding into the dough. What did I do wrong?
This can happen, especially with certain types of sprinkles. To minimize bleeding, try using jimmies or nonpareils, which tend to hold their color better. Also, avoid overmixing the dough once the sprinkles are added, and consider chilling the dough for about 30 minutes before baking to help set the colors.
Birthday Cake Cookies
Soft and chewy birthday cake cookies loaded with rainbow sprinkles for a festive treat.
Ingredients
-
½ cup unsalted butter, softened
-
¾ cup sugar
-
¼ cup brown sugar
-
1 large egg
-
1 ½ tsp vanilla extract
-
¼ tsp almond extract
-
1 ½ cup flour
-
2 tsp corn starch
-
½ tsp baking soda
-
½ tsp sea salt
-
½ cup rainbow sprinkles
Instructions
-
Step 1
In a large bowl, cream together the softened butter, granulated sugar, and brown sugar until light and fluffy. -
Step 2
Beat in the egg, vanilla extract, and almond extract until well combined. -
Step 3
In a separate medium bowl, whisk together the flour, corn starch, baking soda, and sea salt. -
Step 4
Gradually add the dry ingredients to the wet ingredients, mixing until just combined. Fold in the rainbow sprinkles. -
Step 5
Drop rounded tablespoons of dough onto a baking sheet lined with parchment paper. -
Step 6
Bake for 9-11 minutes, or until the edges are lightly golden and the centers are still slightly soft. -
Step 7
Let the cookies cool on the baking sheet for a few minutes before transferring them to a wire rack to cool completely.
Important Information
Nutrition Facts (Per Serving)
It is important to consider this information as approximate and not to use it as definitive health advice.
Allergy Information
Please check ingredients for potential allergens and consult a health professional if in doubt.