Maple Glazed Apple Blondies – Chewy Autumn Dessert
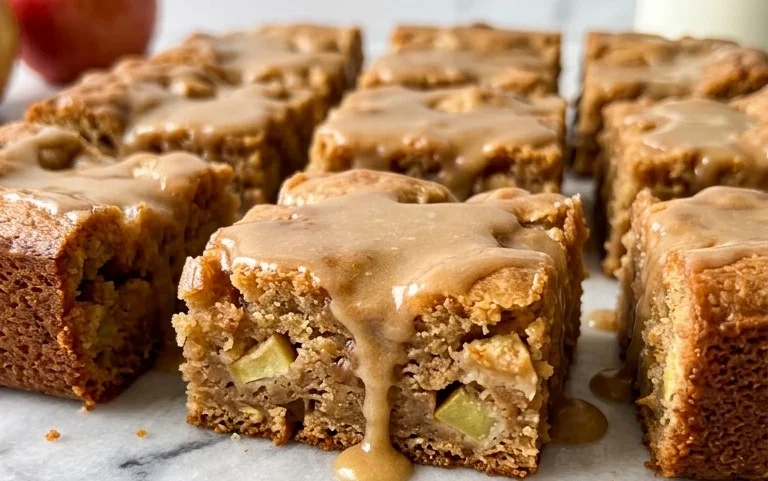
Maple Glazed Apple Blondies are the ultimate hug in a bite, a dessert that truly embodies cozy comfort and autumn’s finest flavors. If you’ve ever found yourself craving something sweet that’s both familiar and exciting, then these delightful treats are about to become your new obsession. We all love a good blondie – that chewy, buttery base packed with brown sugar goodness – but when you introduce the warm, spiced essence of apples and a shimmering, sticky maple glaze, something truly magical happens. It’s this perfect marriage of textures and tastes: the tender, slightly tart apples nestled within the rich, dense blondie, all kissed by the deep, sweet embrace of maple. These Maple Glazed Apple Blondies aren’t just a dessert; they’re an experience, a way to capture the very essence of fall in every single delectable square.
Maple Glazed Apple Blondies
There’s something truly magical about the combination of warm, spiced apples and a buttery, chewy blondie base. And when you add a luscious maple glaze to the mix? Well, you’ve just created pure dessert perfection. These Maple Glazed Apple Blondies are my absolute favorite way to usher in autumn, but honestly, they’re delicious any time of year. The tender chunks of apple, infused with cinnamon and a hint of maple, nestle into a rich, dense blondie that has just the right amount of chew. The drizzle of maple glaze on top is the crowning glory, adding an extra layer of sweetness and flavor that will have everyone reaching for a second (or third!) piece. They’re surprisingly easy to make, making them a perfect weekend baking project or a delightful treat to whip up for a potluck. Let’s get baking!
Ingredients:
- 2 cups all purpose flour
- 1 tsp baking powder
- 1/2 tsp salt
- 1 cup butter (softened)
- 1/4 cup sugar
- 1 cup dark brown sugar
- 2 large eggs
- 1 1/2 tsp vanilla extract
- 1/2 tsp cinnamon
- 2 large apples (chopped finely)
- 2 Tbsp brown sugar
- 1 Tbsp butter
- 1/2 tsp vanilla extract
- 1/2 tsp cinnamon
- 2 Tbsp butter
Preparing the Apple Filling
Before we even think about the blondie batter, let’s get our apples ready. This step is crucial for ensuring those apple pieces are tender and flavorful, not hard or bland. Start by finely chopping your two large apples. You want them to be small, bite-sized pieces so they distribute evenly throughout the blondies. In a medium saucepan, melt 1 tablespoon of butter over medium heat. Once melted, add the finely chopped apples, 2 tablespoons of brown sugar, 1/2 teaspoon of cinnamon, and the remaining 1/2 teaspoon of vanilla extract. Stir everything together until the apples are well coated. Cook this mixture for about 5-7 minutes, stirring occasionally, until the apples have softened slightly. We’re not trying to make applesauce here; we just want them tender enough to bake into the blondies. Once they’ve softened, remove the pan from the heat and set the apple mixture aside to cool. This cooling step is important so that the hot apples don’t start to cook our blondie batter prematurely.
Making the Blondie Batter
Now for the star of the show: the blondie batter! In a large bowl, whisk together the 2 cups of all-purpose flour, 1 teaspoon of baking powder, and 1/2 teaspoon of salt. This dry ingredient mixture will help ensure our blondies have the right texture and rise. In a separate, larger bowl, cream together the 1 cup of softened butter with 1/4 cup of granulated sugar and 1 cup of dark brown sugar. Creaming means beating them together until the mixture is light and fluffy. This can be done with an electric mixer or vigorously by hand. The dark brown sugar is key here for that rich, caramel-like flavor and chewy texture that blondies are known for. Once the butter and sugars are well combined and fluffy, beat in the 2 large eggs, one at a time, making sure each egg is fully incorporated before adding the next. Then, stir in the 1 1/2 teaspoons of vanilla extract and the 1/2 teaspoon of cinnamon until everything is well combined.
Combining and Baking
Gradually add the dry ingredients to the wet ingredients, mixing on low speed (if using a mixer) or stirring with a spatula until just combined. Be careful not to overmix the batter, as this can lead to tough blondies. Once the flour mixture is mostly incorporated, gently fold in the cooled apple filling. Distribute the apple chunks as evenly as possible throughout the batter. Pour the batter into a greased and floured 8×8 inch baking pan. You can also line the pan with parchment paper, leaving an overhang on the sides to make lifting the baked blondies out easier. Spread the batter evenly in the pan.
Now it’s time to bake! Preheat your oven to 350 degrees Fahrenheit (175 degrees Celsius). Bake for 25-30 minutes, or until a toothpick inserted into the center comes out with moist crumbs attached. We want them to be slightly underbaked for that perfect chewy texture. Resist the urge to overbake! Once they’re out of the oven, let them cool in the pan for about 10-15 minutes before you attempt to remove them.
The Maple Glaze
While the blondies are cooling, let’s prepare the irresistible maple glaze. In a small saucepan over low heat, melt the remaining 2 tablespoons of butter. Once melted, whisk in the 2 tablespoons of packed brown sugar (yes, more brown sugar for that deep flavor!), 1/2 teaspoon of vanilla extract, and 1/2 teaspoon of cinnamon. Stir constantly until the brown sugar is completely dissolved and the glaze is smooth and slightly thickened. This should only take a minute or two.
Finishing Touches and Serving
Once the blondies have cooled for at least 15 minutes, carefully lift them out of the pan using the parchment paper overhang (if you used it) or gently invert them onto a cutting board if you greased and floured the pan. While the blondies are still warm, drizzle the prepared maple glaze generously over the top. The warmth of the blondies will help the glaze melt and seep in slightly, creating a beautiful sheen and an extra burst of flavor. Allow the glaze to set for a few minutes before cutting the blondies into squares. These Maple Glazed Apple Blondies are absolutely divine served warm with a scoop of vanilla ice cream or simply on their own. Enjoy every delicious bite!
Conclusion:
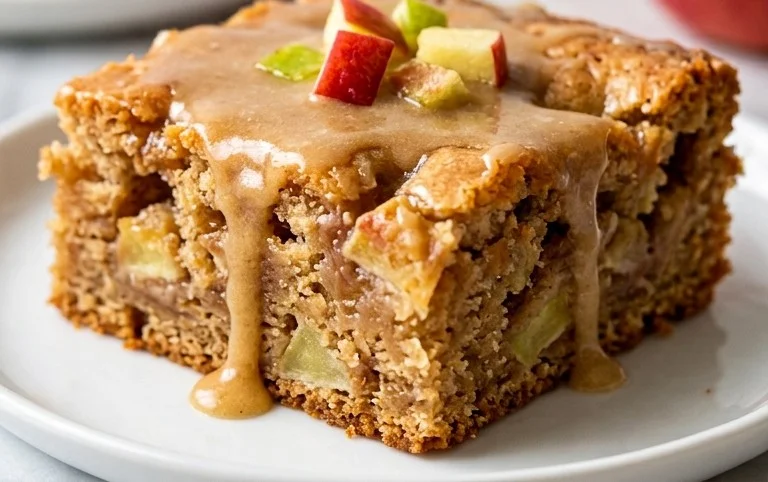
And there you have it – a recipe for Maple Glazed Apple Blondies that is sure to become a new favorite! These blondies are simply divine, boasting a chewy, buttery base studded with tender chunks of apple, all drizzled with a luscious maple glaze. They offer the perfect balance of sweet and tart, with a comforting warmth that’s ideal for any occasion. Whether you’re looking for a delightful afternoon treat, a crowd-pleasing dessert, or a thoughtful homemade gift, these maple glazed apple blondies deliver. I highly encourage you to give them a try; you won’t regret the cozy aroma that will fill your kitchen and the pure joy of that first bite.
For serving, I love these warm, perhaps with a dollop of vanilla ice cream or a spoonful of whipped cream. They also stand beautifully on their own with a cup of coffee or tea. Looking to switch things up? Consider adding a sprinkle of cinnamon to the batter for an extra layer of spice, or incorporate some toasted pecans or walnuts for added crunch. You could even use pears instead of apples for a delightful variation!
Frequently Asked Questions:
Can I make these maple glazed apple blondies ahead of time?
Absolutely! These blondies store wonderfully. Once cooled, you can keep them in an airtight container at room temperature for up to 3 days. They are often even better the next day as the flavors meld.
What kind of apples work best?
For the best texture and flavor, I recommend using apples that hold their shape well when baked, such as Honeycrisp, Fuji, or Gala. Avoid overly soft apples like Red Delicious, as they can turn mushy.
My glaze is too thin, what can I do?
If your maple glaze is thinner than you’d like, simply whisk in a little more powdered sugar, a tablespoon at a time, until it reaches your desired drizzling consistency. Alternatively, if it’s too thick, add a tiny bit more maple syrup or a drop of milk.
Maple Glazed Apple Blondies
Soft and chewy blondies with sweet apple pieces and a rich maple glaze.
Ingredients
-
2 cups all purpose flour
-
1 tsp baking powder
-
1/2 tsp salt
-
1 cup butter (softened)
-
1/4 cup sugar
-
1 cup dark brown sugar
-
2 large eggs
-
1 1/2 tsp vanilla extract
-
1/2 tsp cinnamon
-
2 large apples (chopped finely)
-
2 Tbsp brown sugar
-
1 Tbsp butter
-
1/2 tsp vanilla extract
-
1/2 tsp cinnamon
-
2 Tbsp butter
Instructions
-
Step 1
Preheat oven to 350°F (175°C). Grease and flour an 8×8 inch baking pan. -
Step 2
In a medium bowl, whisk together flour, baking powder, and salt. Set aside. -
Step 3
In a large bowl, cream together softened butter, granulated sugar, and dark brown sugar until light and fluffy. Beat in eggs one at a time, then stir in vanilla extract and cinnamon. -
Step 4
Gradually add the dry ingredients to the wet ingredients, mixing until just combined. Fold in the chopped apples. -
Step 5
Spread the batter evenly into the prepared baking pan. Bake for 25-30 minutes, or until a toothpick inserted into the center comes out clean. -
Step 6
While the blondies are baking, prepare the glaze. In a small saucepan over medium heat, melt 1 Tbsp butter with 2 Tbsp brown sugar, 1/2 tsp vanilla extract, and 1/2 tsp cinnamon until smooth. -
Step 7
Once the blondies are out of the oven, drizzle the glaze evenly over the top. Let cool completely before cutting into bars.
Important Information
Nutrition Facts (Per Serving)
It is important to consider this information as approximate and not to use it as definitive health advice.
Allergy Information
Please check ingredients for potential allergens and consult a health professional if in doubt.