Easy Homemade Fruit Snacks- Delicious & Healthy Treats
Homemade fruit snacks recipe. Tired of those brightly colored, artificially flavored pouches that seem to be in every lunchbox? I know I was. That’s why I set out on a mission to create a delicious and wholesome alternative that my family would absolutely adore. There’s something incredibly satisfying about knowing exactly what goes into your food, and these homemade fruit snacks deliver that peace of mind in every chewy bite. What makes them so special? For starters, we get to harness the pure, unadulterated sweetness and vibrant flavors of real fruit, skipping all the unnecessary preservatives and artificial gunk. They’re wonderfully customizable, allowing you to play with different fruit combinations and even add a touch of natural sweetener if you desire. Get ready to ditch the store-bought and embrace the homemade goodness – these fruit snacks are a game-changer!
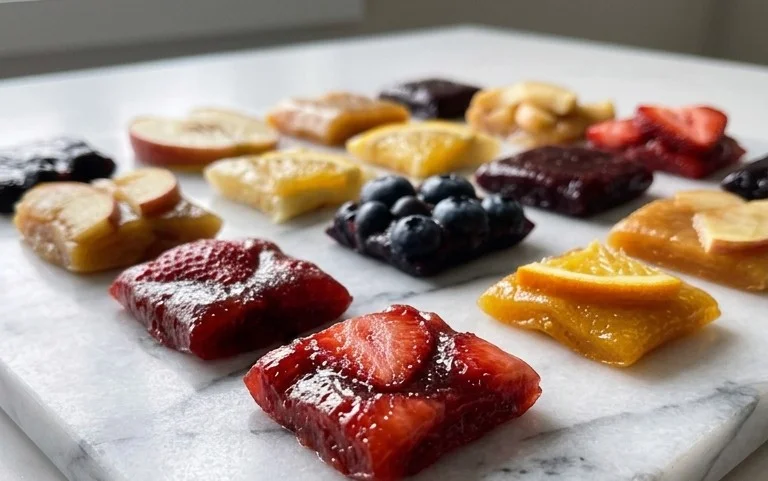
Homemade Fruit Snacks Recipe
Tired of the processed, artificial-laden fruit snacks that seem to line every checkout aisle? I know I was! That’s why I set out on a mission to create a healthier, more wholesome version right in my own kitchen. And let me tell you, these homemade fruit snacks are a game-changer. They’re packed with real fruit and veggie goodness, sweetened naturally, and incredibly fun to make. Plus, the best part? You control exactly what goes into them, making them perfect for little ones with dietary sensitivities or anyone looking for a genuinely good-for-you treat. Forget the artificial colors and flavors; we’re diving into a world of vibrant, natural deliciousness!
The beauty of this recipe lies in its flexibility. While I’ve provided a specific combination of fruits and vegetables, feel free to experiment with your favorites. The key is to maintain a balance of sweetness from the fruit and a good texture from the blended mixture. I love using a medley of berries and softer fruits like peaches for their natural sweetness and vibrant colors. For the vegetables, think about those that blend well and don’t overpower the fruit flavor – carrots, zucchini, and even a hint of beets add nutrients without compromising taste.
Making these fruit snacks is more than just a recipe; it’s a creative process. It’s about harnessing the power of nature to create something truly delightful. So, grab your apron, and let’s get started on these incredibly satisfying homemade fruit snacks! They’re perfect for lunchboxes, after-school snacks, or even a little pick-me-up any time of day.
Ingredients:
Making Your Fruit and Veggie Base
The first step in creating our delightful fruit snacks is to prepare the flavor foundation. This involves blending our chosen fruits and vegetables into a smooth puree. You’ll want to ensure your fruits are ripe and juicy for the best flavor and sweetness.
1. Prepare Your Produce: Start by thoroughly washing all your fruits and vegetables. For the strawberries, remove the green tops. If your peaches have fuzzy skin, you can peel them, though it’s not strictly necessary if you have a powerful blender. Chop the fruits and vegetables into roughly ½-inch pieces. This will help your blender work more efficiently.
2. Blend the Base: In a high-powered blender or food processor, combine the green grapes, diced strawberries, chopped peaches, blueberries, spinach, peeled and chopped beets, chopped carrots, and chopped zucchini. Add ¼ cup of the pure apple juice to begin. Blend on high speed until the mixture is completely smooth and there are no discernible chunks of fruit or vegetable. If the mixture is too thick to blend properly, add another tablespoon or two of apple juice at a time, but be careful not to add too much, as you want a concentrated flavor. This initial puree is where the magic begins, transforming simple ingredients into a vibrant base.
Cooking and Gelatin Infusion
Now that we have our beautifully blended fruit and veggie base, it’s time to introduce the ingredients that will give our fruit snacks their signature chewy texture. Gelatin is the star here, and it’s important to handle it correctly to ensure a smooth, lump-free result.
1. Heat the Mixture: Pour the smooth fruit and vegetable puree into a medium saucepan. Add the raw honey and pure vanilla extract. Stir everything together to ensure the honey is well incorporated. Place the saucepan over medium-low heat. We don’t want to boil this mixture vigorously; we’re just aiming to gently heat it to help the gelatin dissolve properly and activate its gelling properties. Stir the mixture frequently as it heats.
2. Dissolve the Gelatin: Once the fruit and veggie mixture is warm (not boiling, just steaming slightly), it’s time to add the gelatin. Sprinkle the 3 tablespoons of gelatin evenly over the surface of the warm mixture. Let it sit for about 1 to 2 minutes without stirring. This allows the gelatin granules to “bloom” or absorb some of the liquid, which helps prevent lumps. After the blooming period, begin whisking the mixture continuously. You’ll notice the gelatin gradually dissolving into the puree. Continue whisking for about 3 to 5 minutes, ensuring there are absolutely no lumps of gelatin remaining. The mixture should become slightly thicker and more uniform in consistency. This step is crucial for achieving that perfect chewy texture.
Setting and Chilling
With our gelatin fully incorporated and the mixture heated through, it’s time to get these into their final form and let them work their magic.
1. Pour into Molds: Prepare your molds. You can use silicone candy molds (these are fantastic for fun shapes!) or a lightly greased 8×8 inch baking pan. If using a baking pan, line it with parchment paper, leaving an overhang on the sides to make it easy to lift out later. Carefully pour the warm, gelatin-infused fruit mixture into your chosen molds or the prepared baking pan. Work relatively quickly, as the mixture will start to thicken as it cools. If you’re using molds, fill them evenly. If you’re using a pan, aim for an even layer, about ¼ to ½ inch thick.
2. Chill to Set: Once filled, carefully transfer the molds or baking pan to the refrigerator. Allow the fruit snacks to chill for at least 2 to 4 hours, or until they are completely firm and set. You’ll know they’re ready when they no longer feel soft or jiggly to the touch. The longer they chill, the firmer they will become. For the baking pan method, once firm, you can gently lift the parchment paper out of the pan and cut the set fruit snack into desired shapes using a sharp knife or pizza cutter. This is where you can get creative and make little squares, rectangles, or even use cookie cutters for fun shapes!
Enjoy your delicious, homemade fruit snacks! They are best stored in an airtight container in the refrigerator for up to a week.
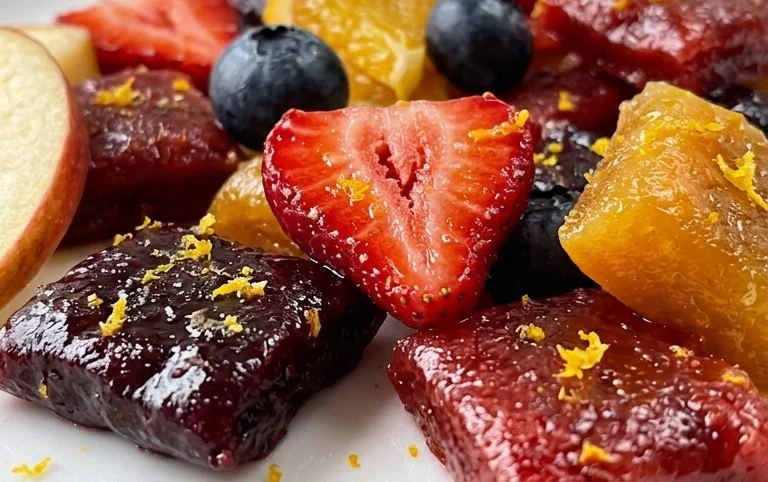
Conclusion:
I hope you’re as excited as I am to try this incredibly simple and delicious Homemade Fruit Snacks Recipe! This recipe truly shines because it allows you to control exactly what goes into your snacks, ditching the artificial colors, flavors, and excessive sugars found in store-bought versions. You get all the fun, chewy goodness of fruit snacks with the natural sweetness and vibrant hues of real fruit. They’re a fantastic way to get more fruit into your diet, and the process itself is incredibly rewarding and enjoyable, especially if you involve kids!
These homemade fruit snacks are wonderfully versatile. Enjoy them as a guilt-free afternoon treat, pack them in lunchboxes for a special surprise, or even use them as a healthy dessert alternative. Feel free to experiment with different fruit combinations – berries, mangoes, peaches, or even a tropical blend will work beautifully. For an extra burst of flavor, consider adding a tiny pinch of cinnamon or ginger.
I absolutely encourage you to dive in and give this recipe a go. It’s surprisingly easy, and the results are so worth it. Let me know in the comments what fruit combinations you try!
Frequently Asked Questions:
How long do these homemade fruit snacks last?
When stored properly in an airtight container in the refrigerator, these homemade fruit snacks should stay fresh for about 7-10 days. Ensure they are completely cooled before sealing the container.
Can I make these fruit snacks vegan?
Absolutely! This recipe is naturally vegan if you use fruit purees as your base. If you decide to use any gelatin alternatives, just ensure they are plant-based, like agar-agar, to maintain their vegan status.
What can I do if my fruit snacks are too sticky?
If your fruit snacks turn out a bit stickier than you’d prefer, you can try lightly dusting them with a small amount of cornstarch or arrowroot powder after they’ve set. You can also try extending the drying time slightly in a very low oven or dehydrator, being careful not to overcook them.
Homemade Fruit Snacks
Easy and healthy homemade fruit snacks made with real fruit, vegetables, and gelatin. A delicious and nutritious treat for all ages.
Ingredients
-
1 cup strawberries diced
-
1 cup green grapes
-
1 cup peaches (chopped)
-
1 cup blueberries
-
¼ cup spinach
-
¼ cup beets
-
¼ cup carrots
-
¼ cup zucchini
-
¼ to ½ cup pure apple juice (no added sugar)
-
2 Tablespoons raw honey
-
¼ teaspoon pure vanilla extract
-
3 Tablespoons gelatin (preferably collagen, grass-fed)
Instructions
-
Step 1
Combine all chopped fruits and vegetables in a blender. -
Step 2
Blend until completely smooth. If the mixture is too thick, add a little more apple juice. -
Step 3
In a small saucepan, whisk together the gelatin and ¼ cup of apple juice over low heat until the gelatin is dissolved. Do not boil. -
Step 4
Add the dissolved gelatin mixture, honey, and vanilla extract to the blender with the fruit and vegetable puree. Blend until well combined. -
Step 5
Pour the mixture into silicone molds or a parchment-lined baking dish. -
Step 6
Refrigerate for at least 2-3 hours, or until firm. -
Step 7
Once set, carefully remove the fruit snacks from the molds or cut into desired shapes.
Important Information
Nutrition Facts (Per Serving)
It is important to consider this information as approximate and not to use it as definitive health advice.
Allergy Information
Please check ingredients for potential allergens and consult a health professional if in doubt.